As I got deeper into the rabbit hole of woodworking, I needed a much better means of holding work. I loved the Roubo style bench from the minute I saw it and had to have one. It's big-box-store SYP and Sapelle with Lake Erie Toolwoorks Maple screws for the vises.
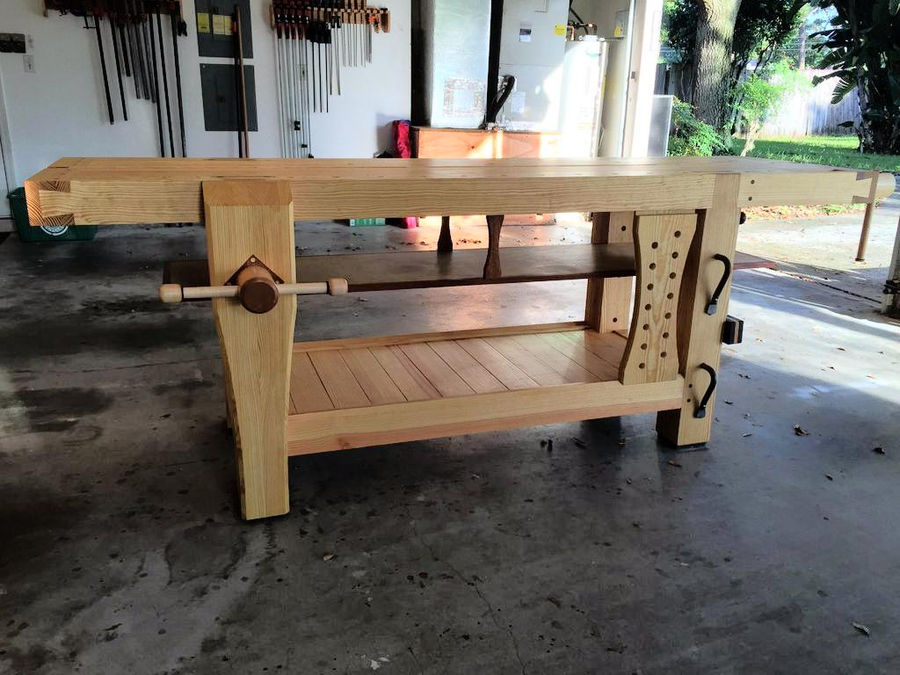
The finished product
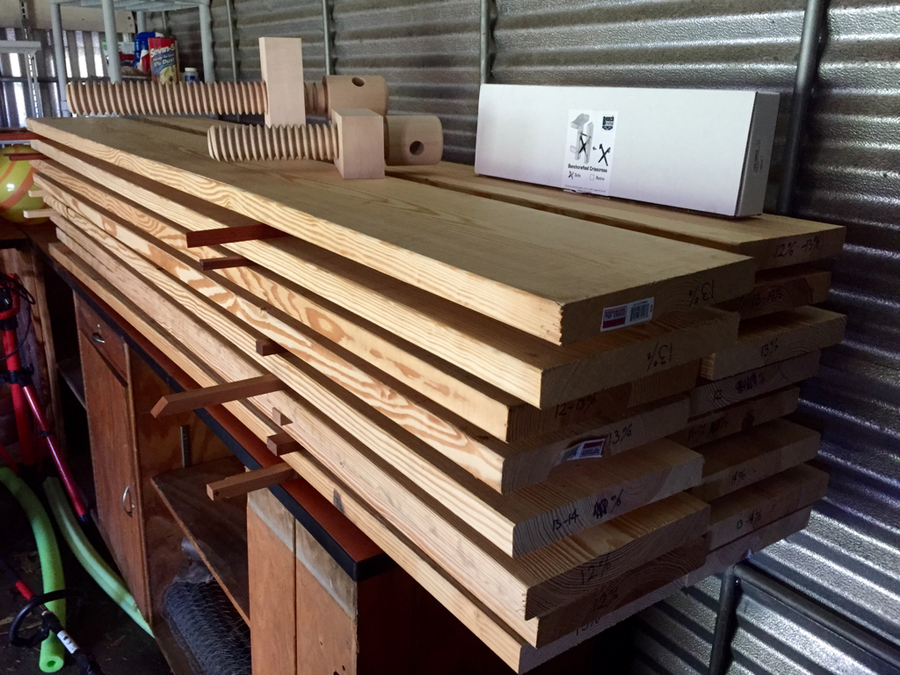
How it started. carefully selected Lowes 2x12x16's, stickered in the shed and allowed to further dry for a few more months.
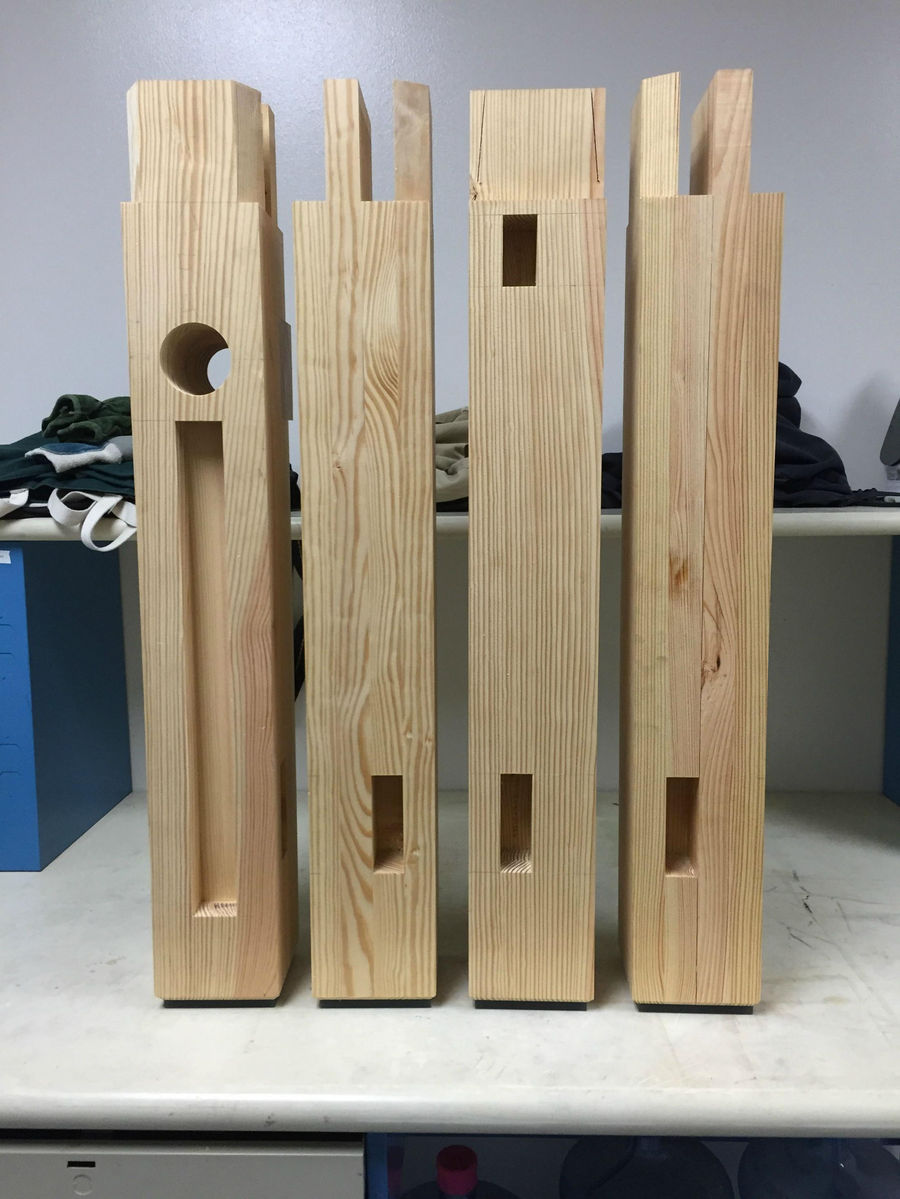
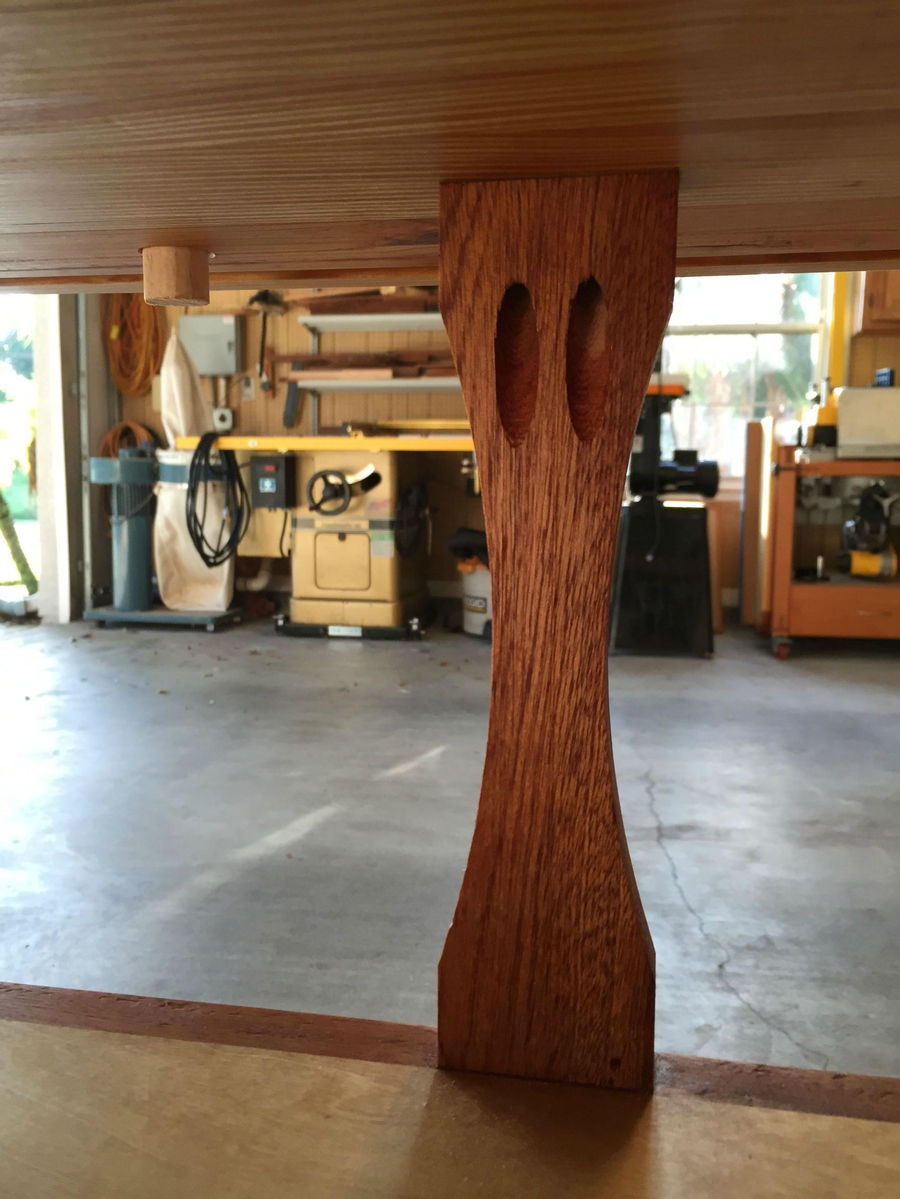
5x5 legs glued up, mortises and tenons cut. Some of the mortises were made a little easier by cutting notches in one board and then sandwiching it between the other boards.
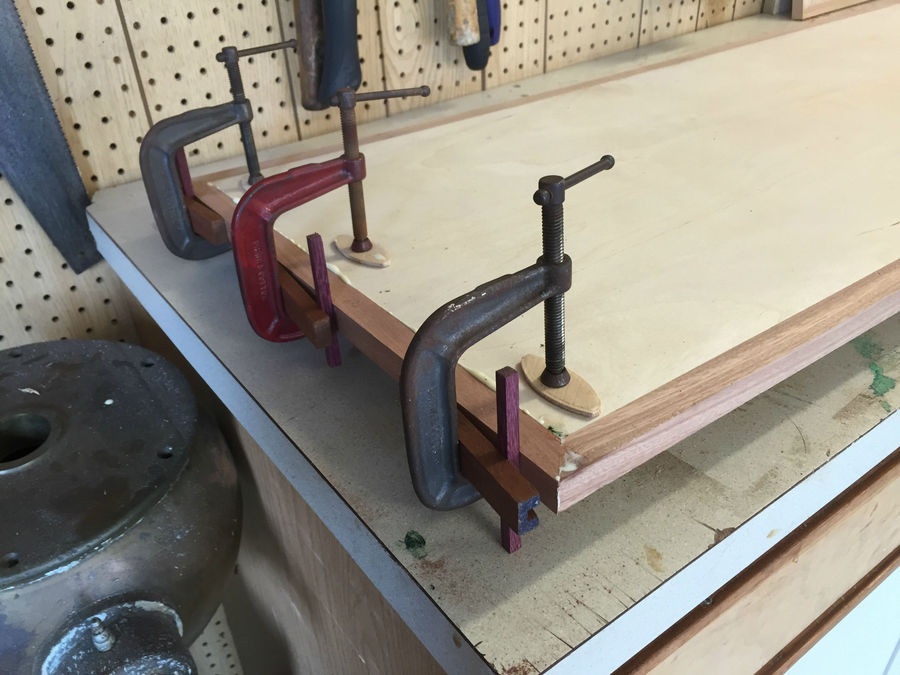
Edge banding the plywood shelf with sapele. Thanks to Matthias Wandel for this trick when none of my clamps were long enough.
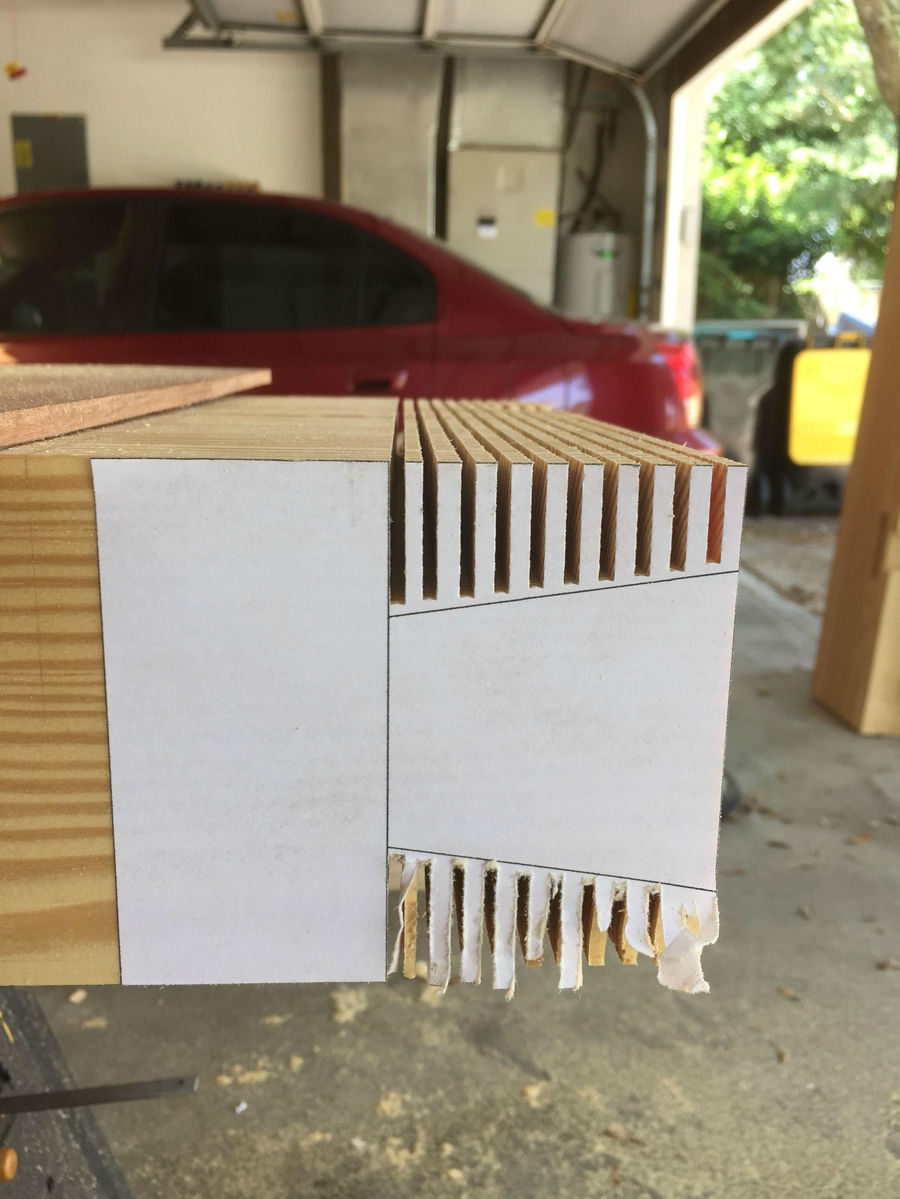
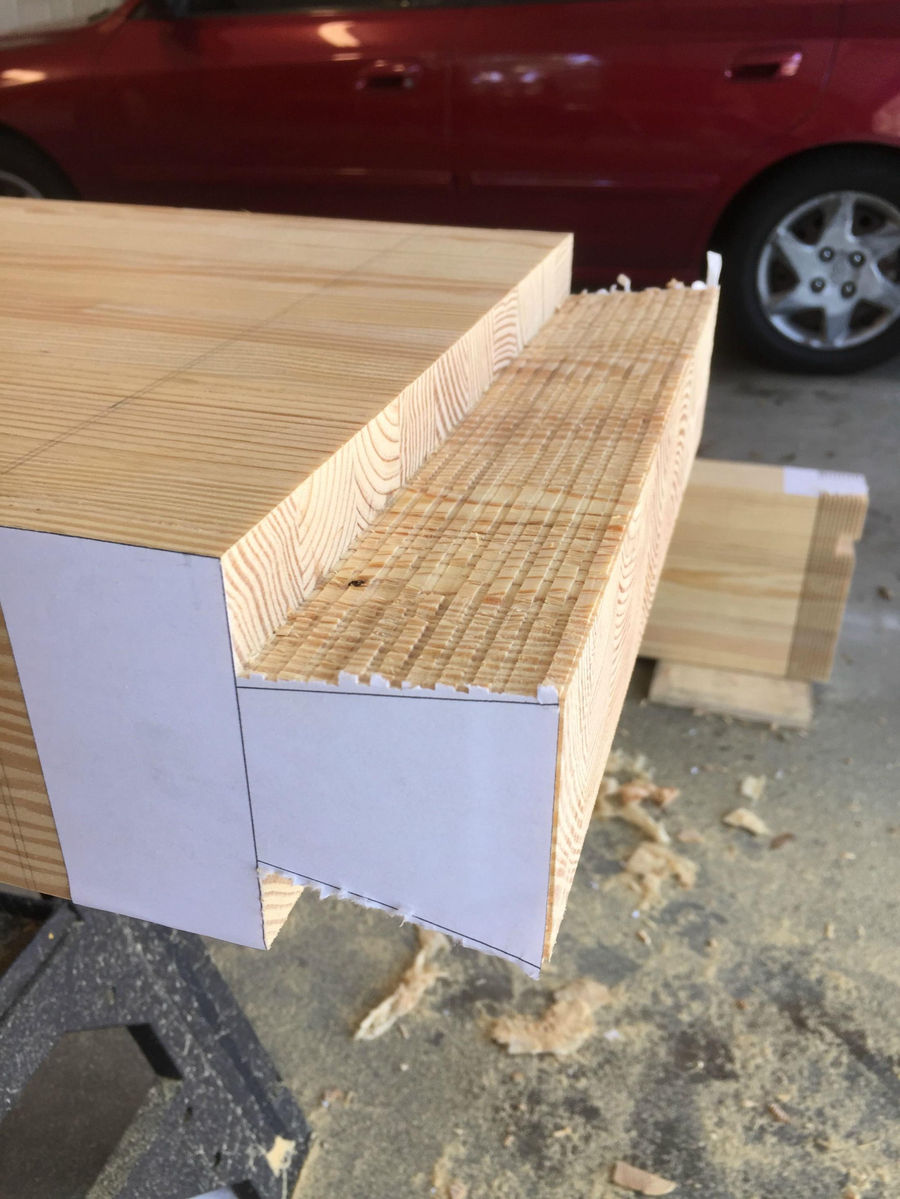
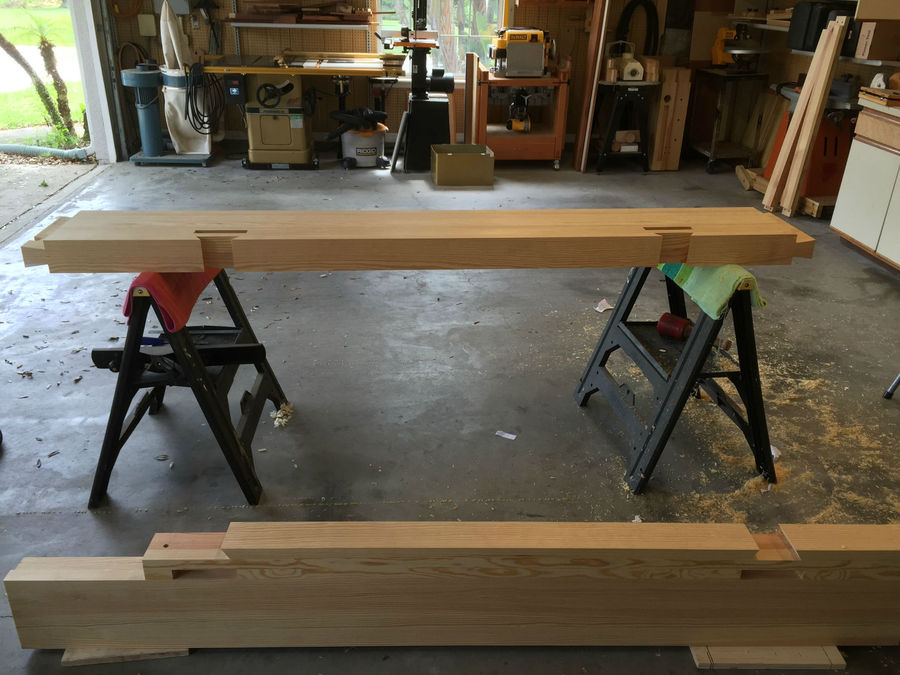
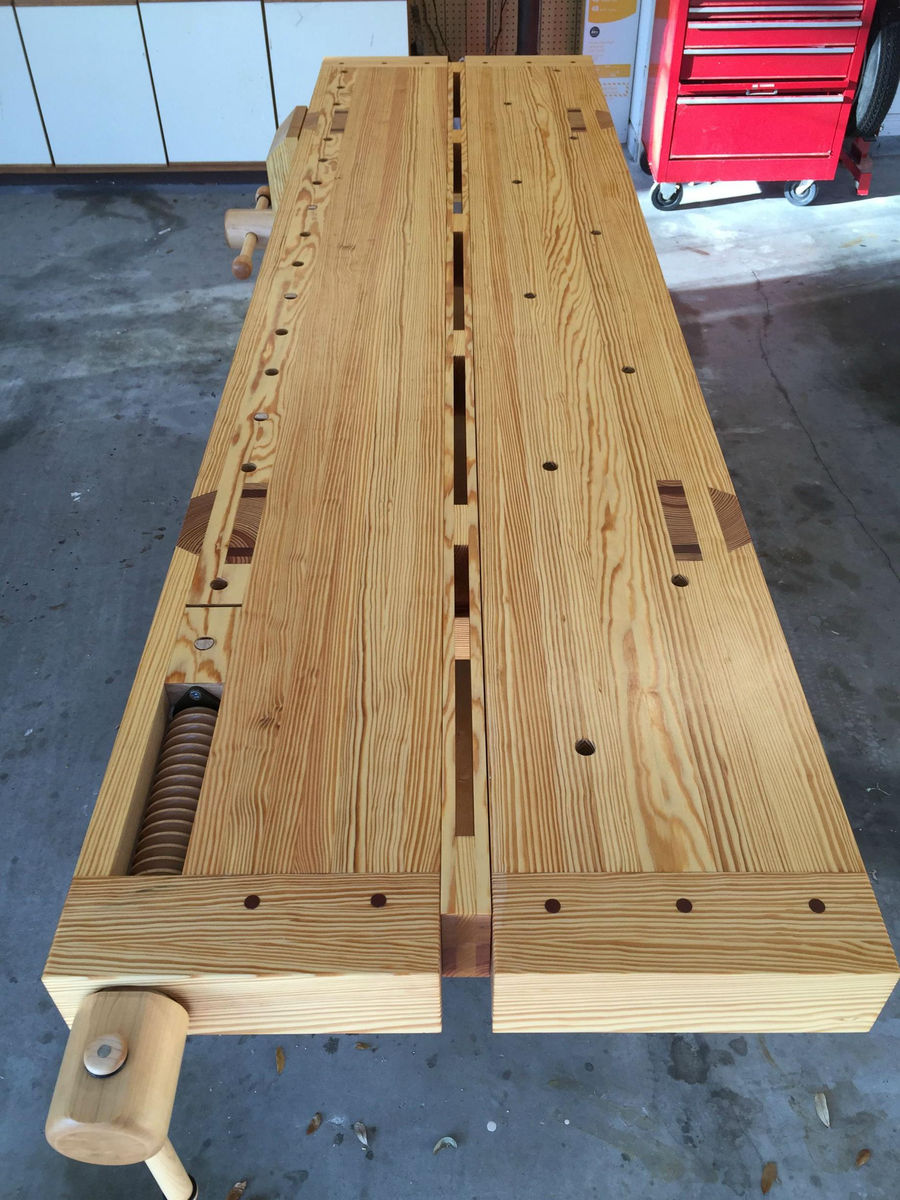
I got way into the building part and forgot to take progress of the base but this is how I cut the sliding dovetail breadboards. The template is printed from Sketchup and the kerfs cut with circular saw and straight edge.
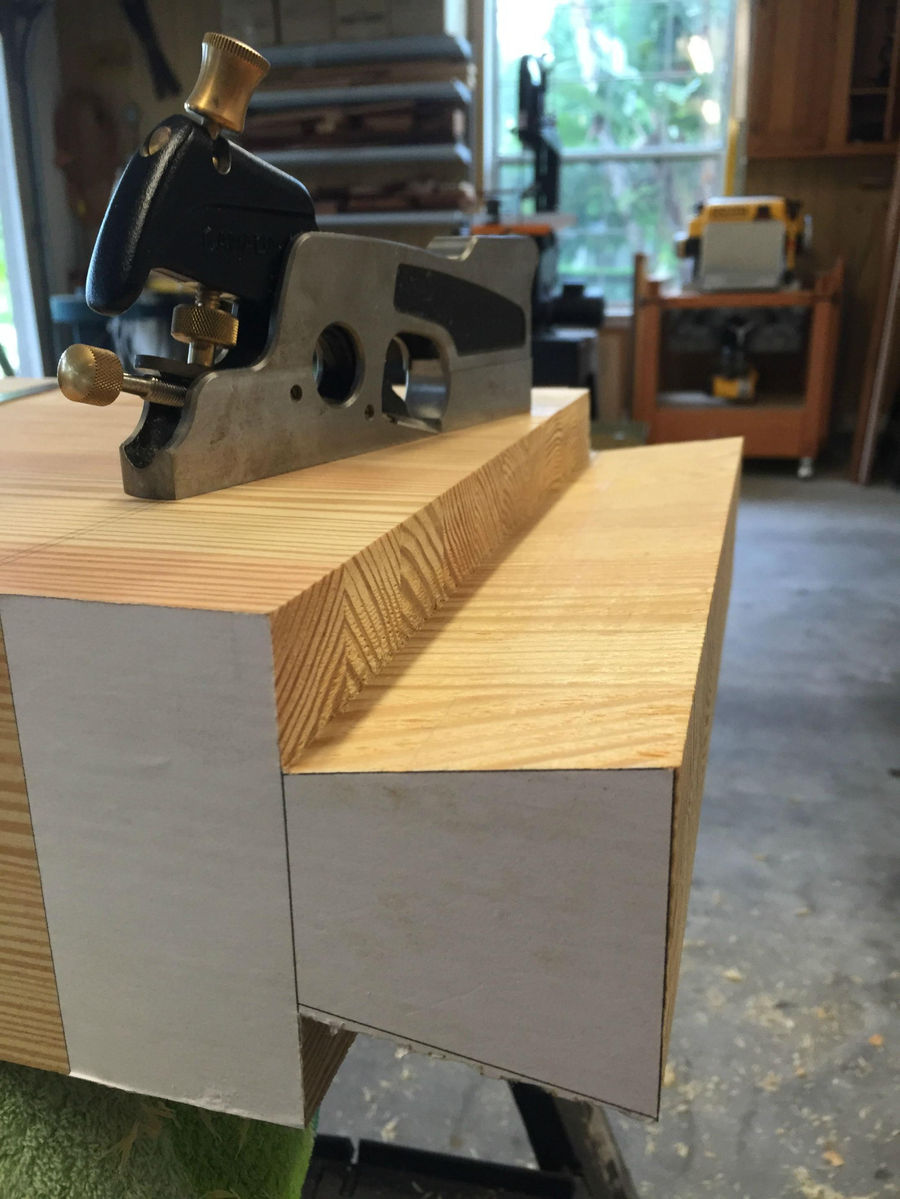
A few hours with shoulder plane, straight edge, and square and they're as pretty as I can make 'em.
A wider shot of the tops. If you look closely, one of the slats on the left side got cut a little short, leaving a gap. No worries, since it will be covered by the breadboard end. As an easter egg for future archaeologists, I slipped a few dollar coins into the gap and then put the end in place.
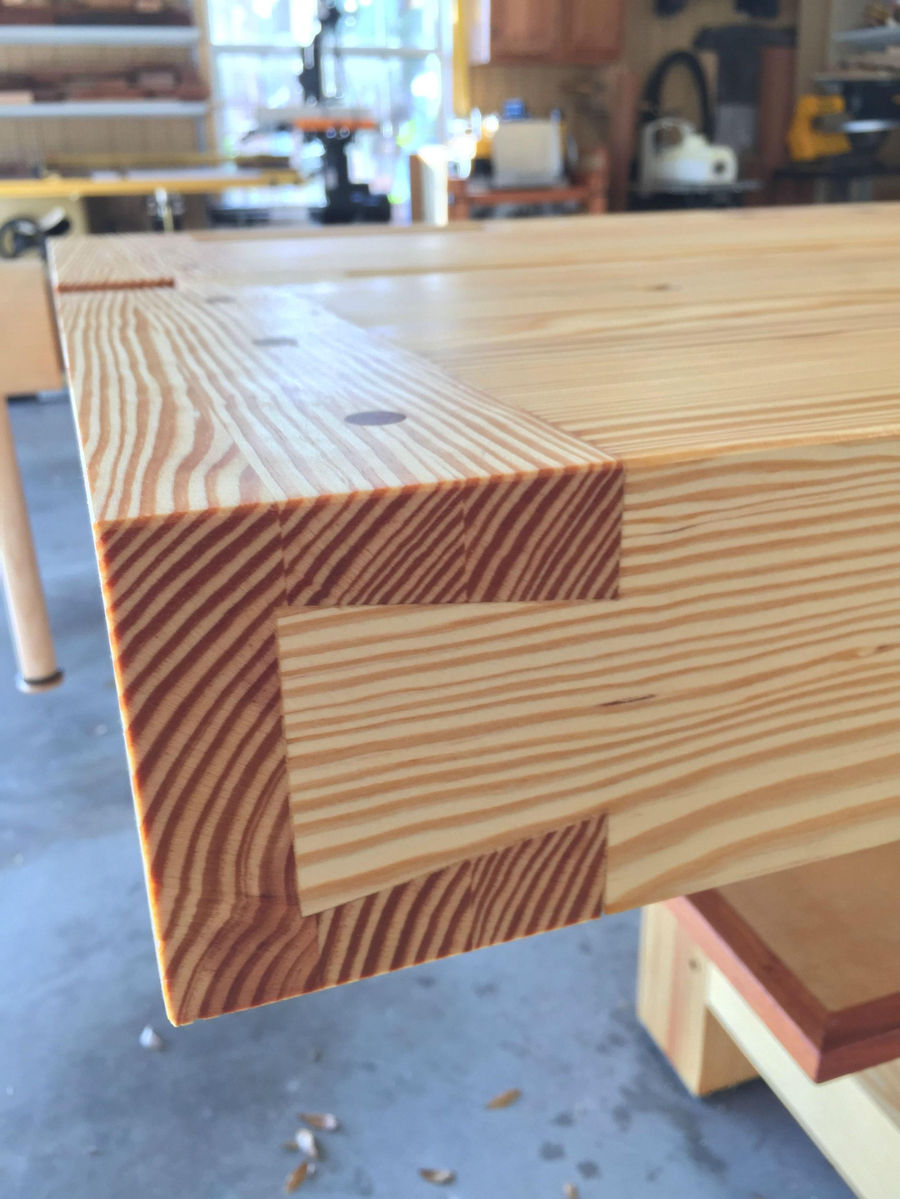
Breadboards in place and drawbore pinned in place. So happy with the fit.

A different angel and light.
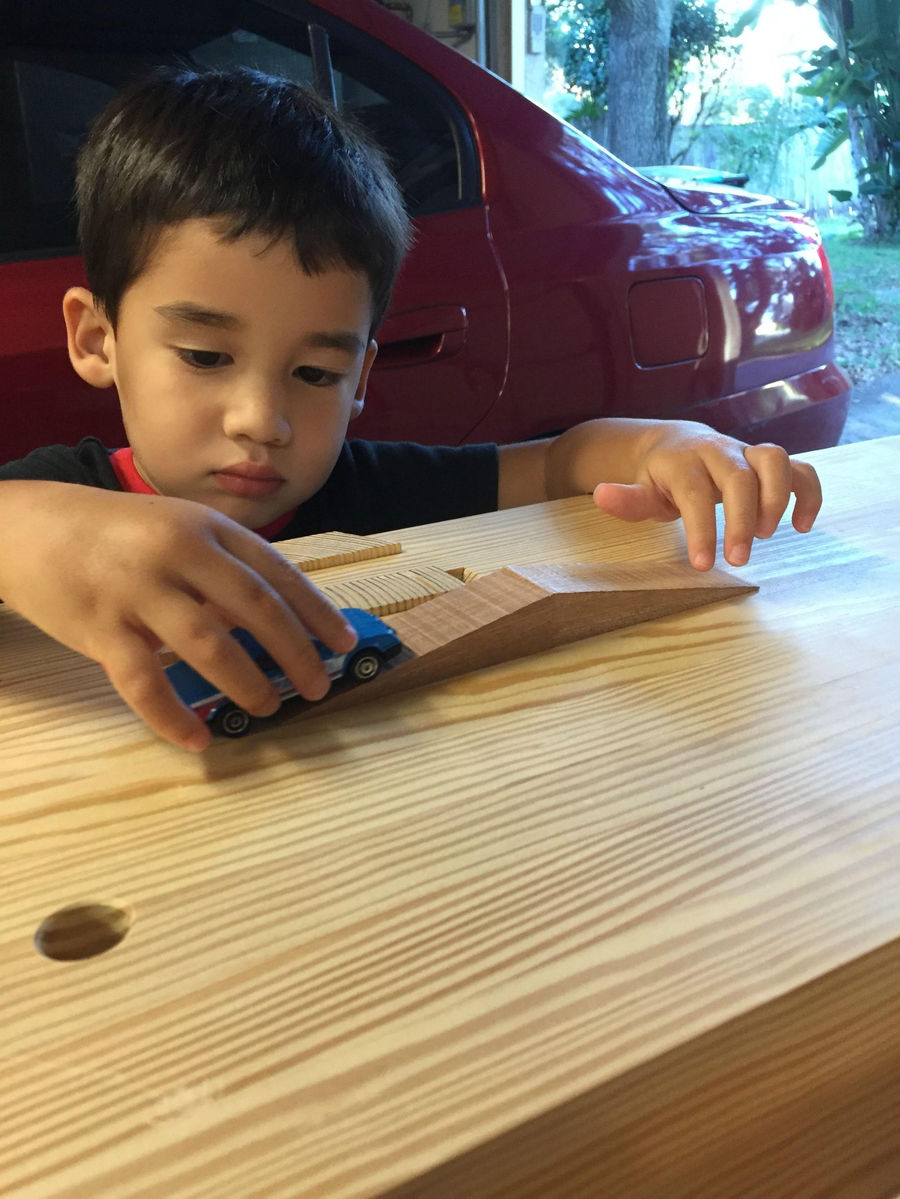
My shop assistant inspects the wedges before they're inserted.

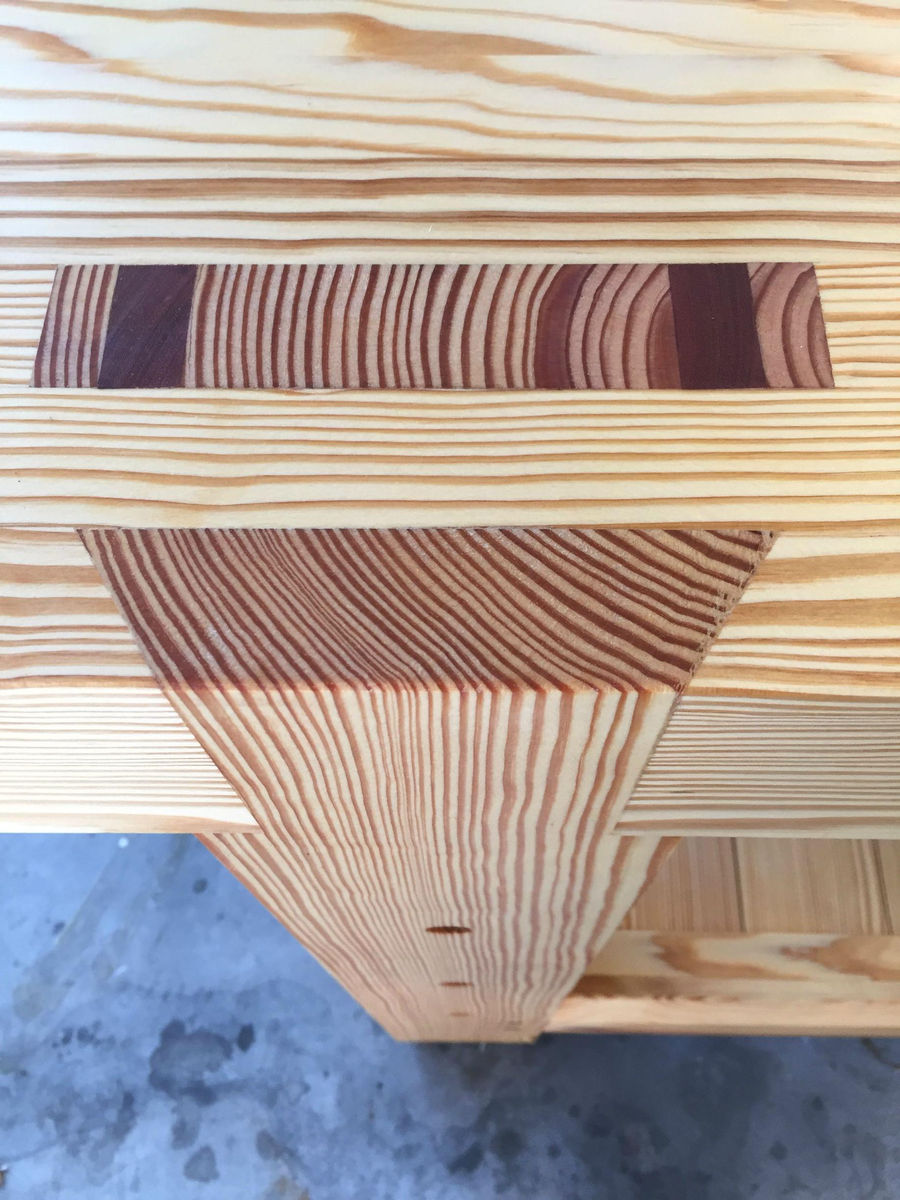
Purty, however, my OCD constantly scolds me for not cutting the back tenons narrower so they'd both be the same width once the wedges were in. Oh well, live and learn.
With a little oil on 'em.
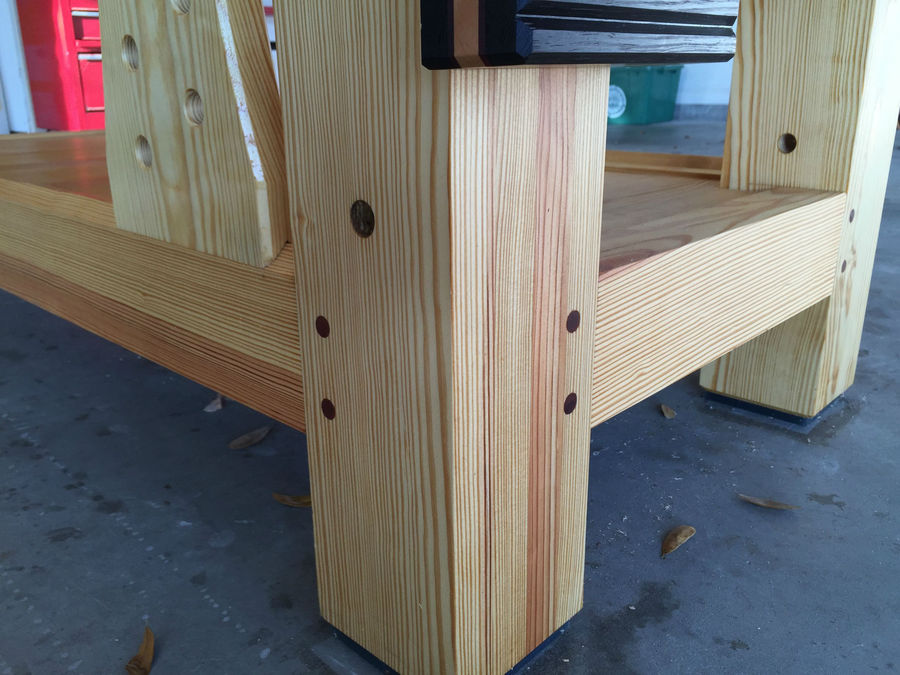
Drawbored legs and stretchers, sapele pins
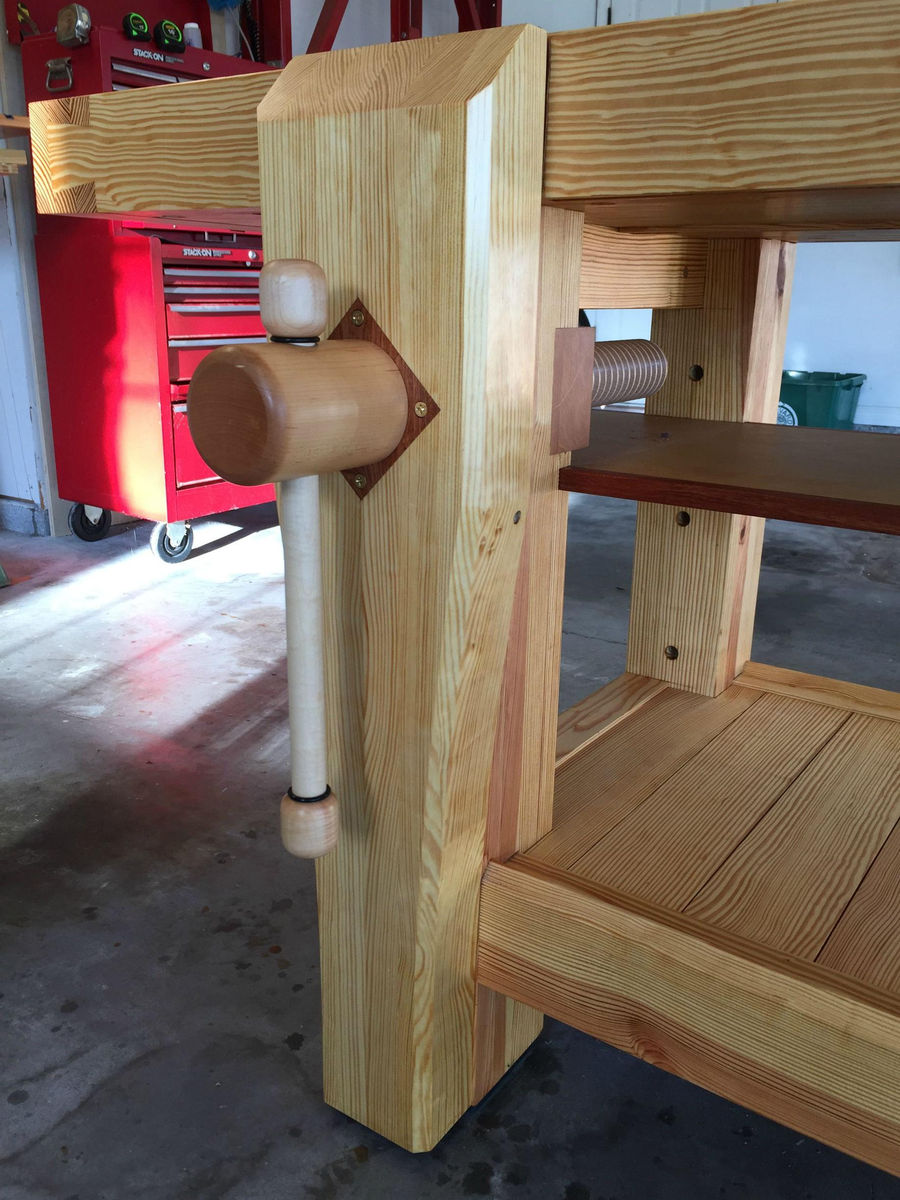
Leg vise with Lake Erie Toolworks hardware. With cork lining it holds like i bolted my work piece to a mountain.

A pretty garter and brass screws (clocked, of course) because any thing worth making is worth making pretty.

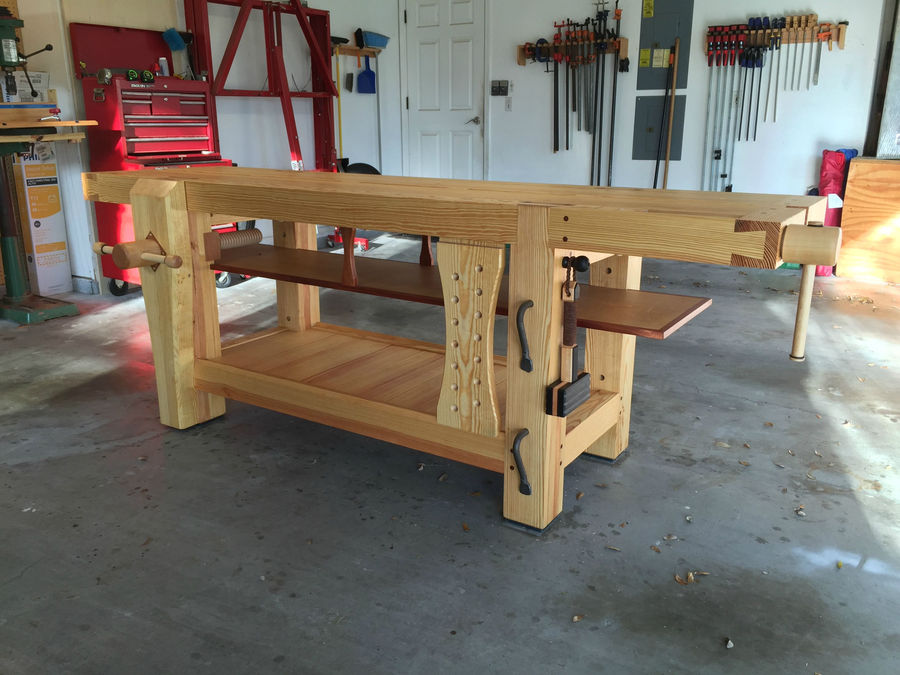
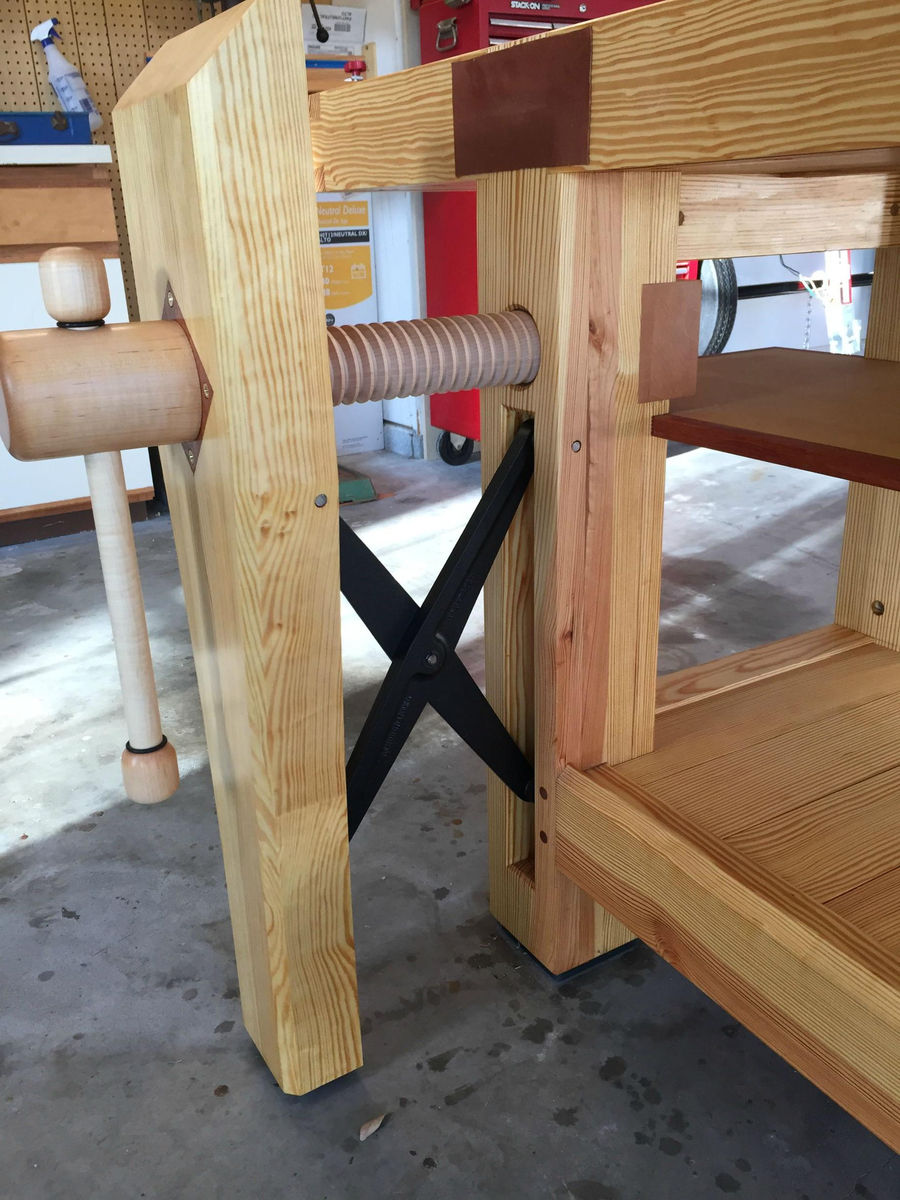
A backside view of the leg vise.
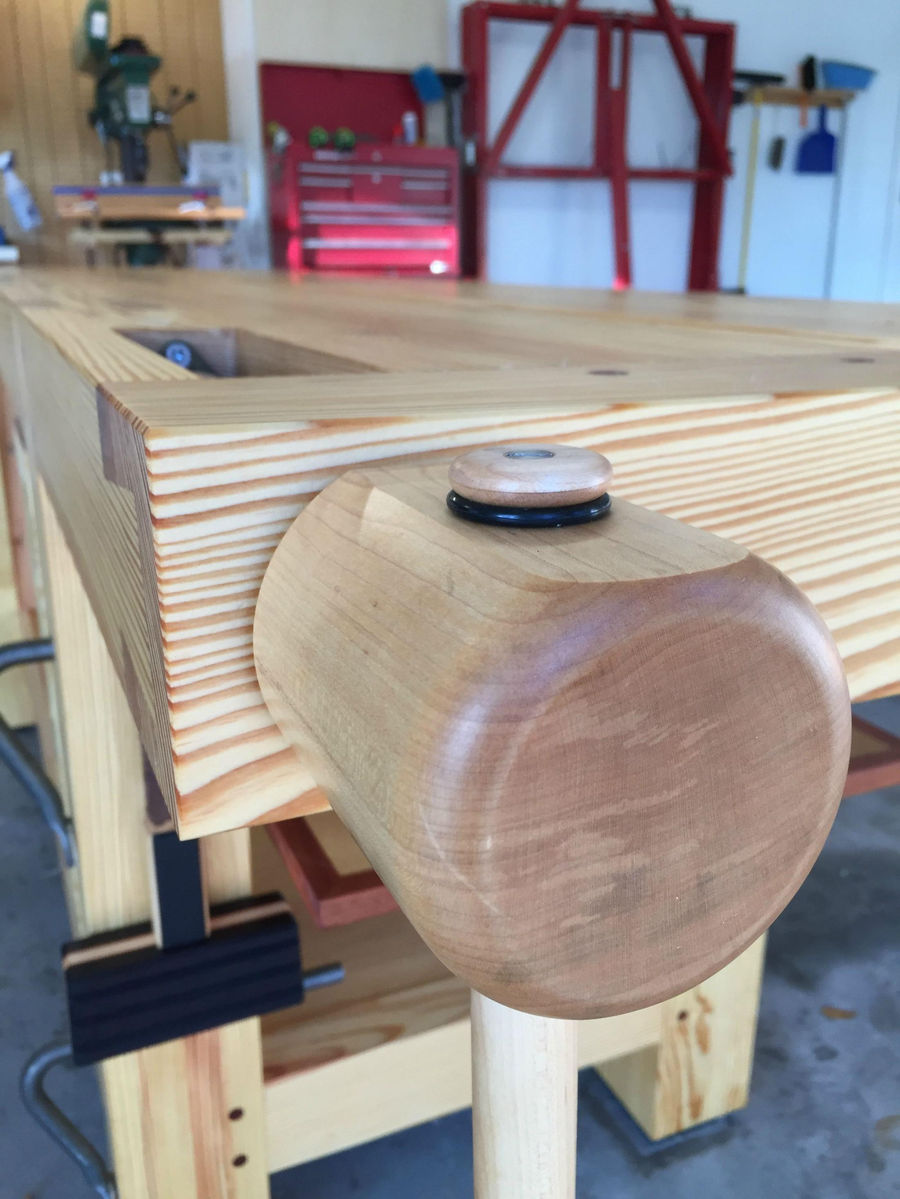
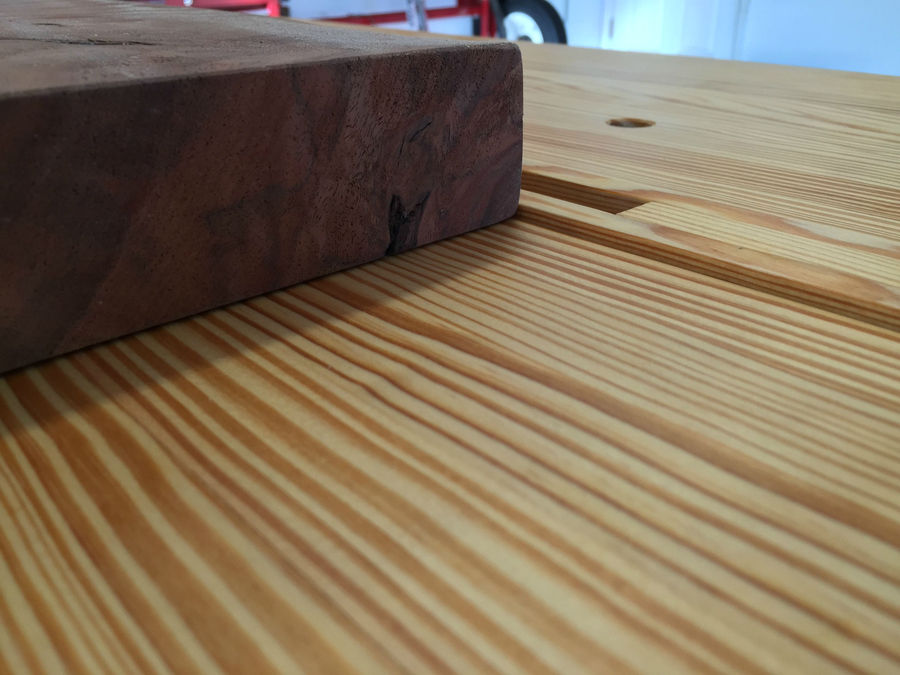
Similar Lake Erie hardware for the wagon vise. I had to shave a little off the head of the screw to keep it all below the plane of the workbench top.
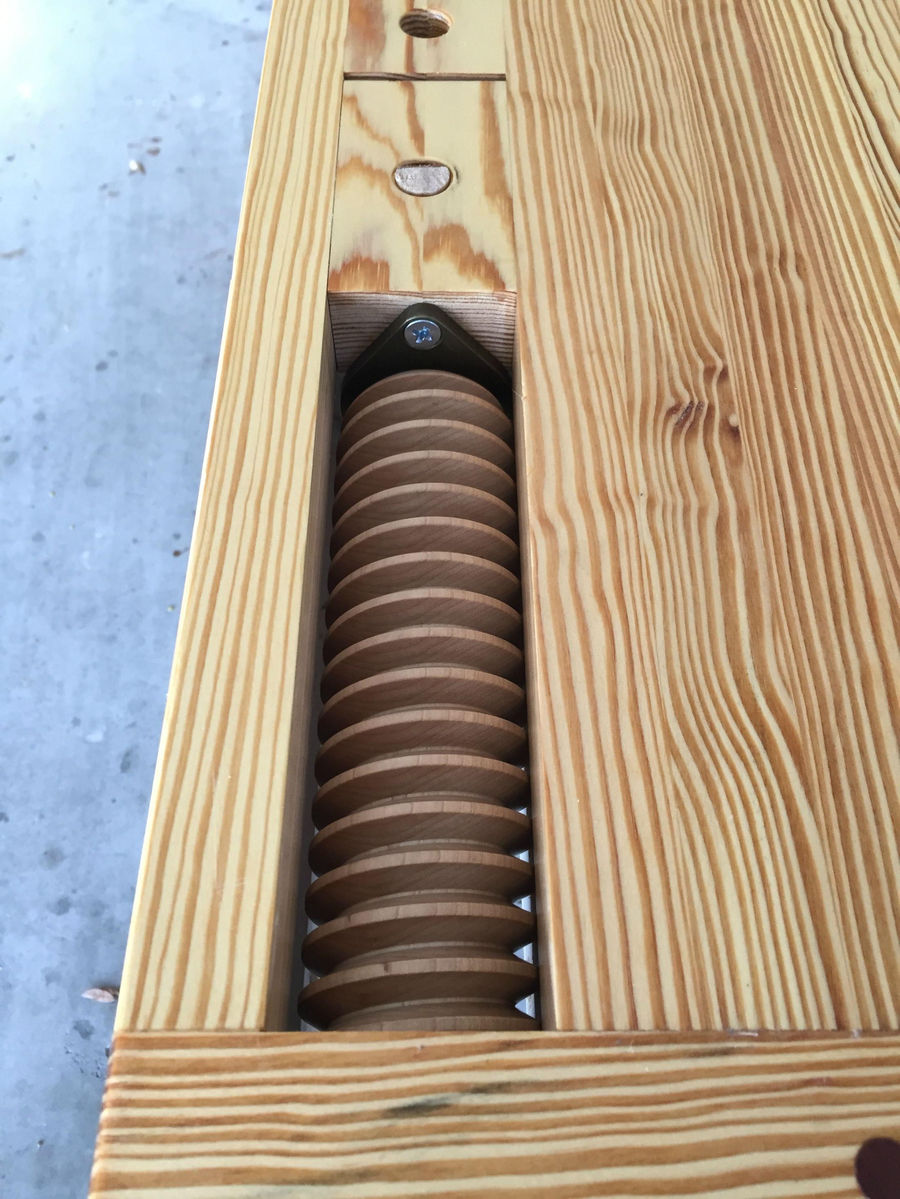
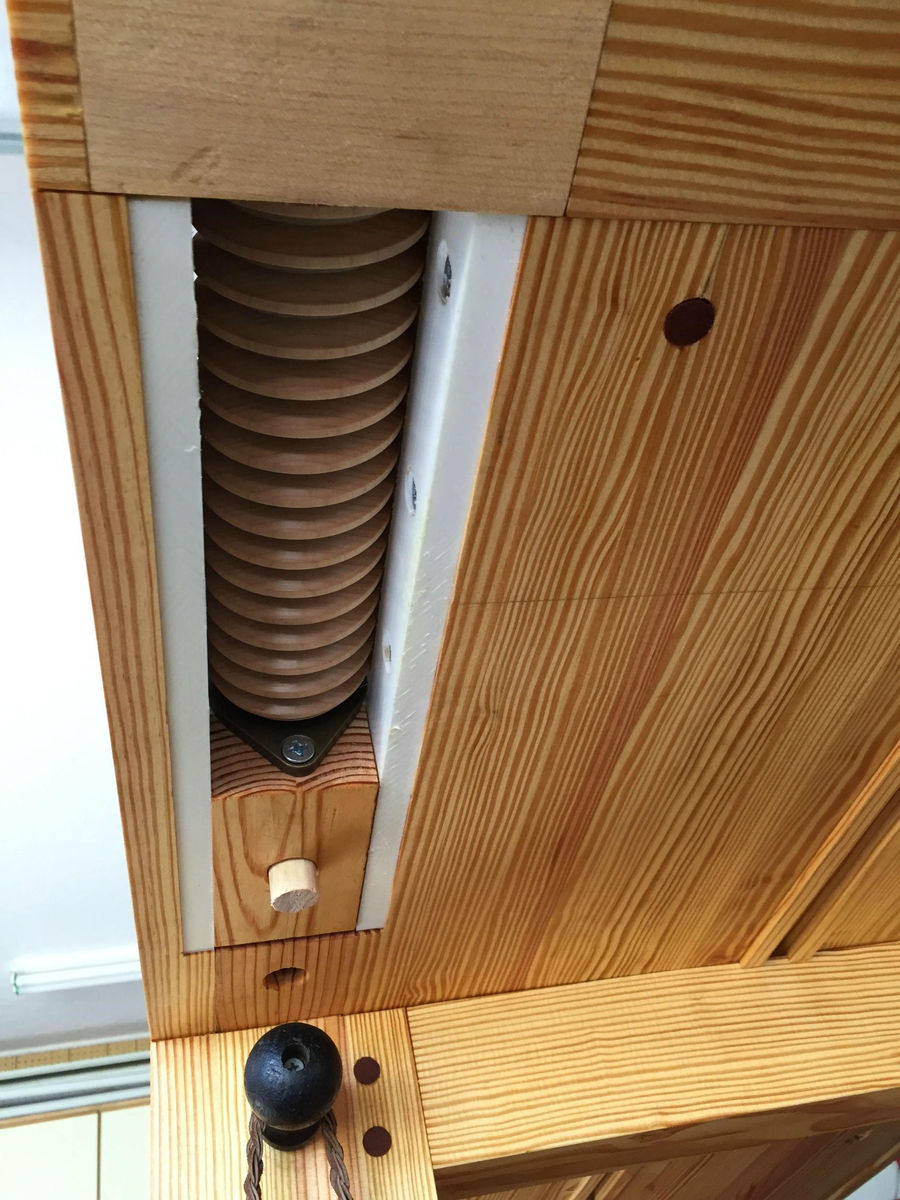
UHMW runners make the action silky smooth.
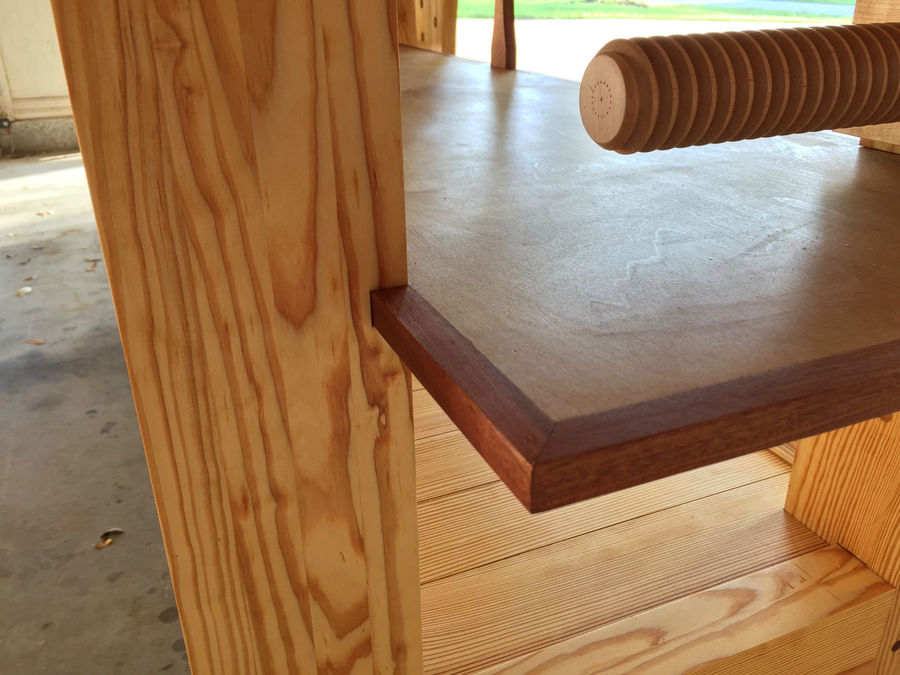
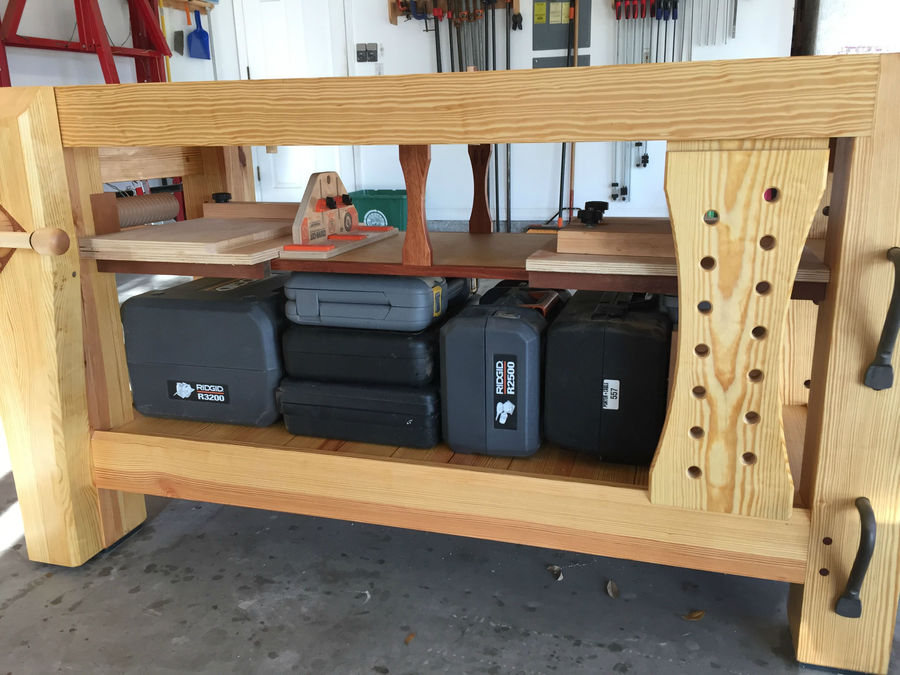
The middle shelf is only held in place by friction and a few hidden screws just in case it ever proves to be a bad idea, but it's been great so far.
Center shelf supports from the back. Screws can easily be removed and the holes never be seen.
The center tool holder/plane stop. In the future, I'll remake this from a solid piece. I use it as a plane stop often, and I remove it for center placed clamps a lot but I never use it to hold tools and shavings are always dropping into the black abyss.
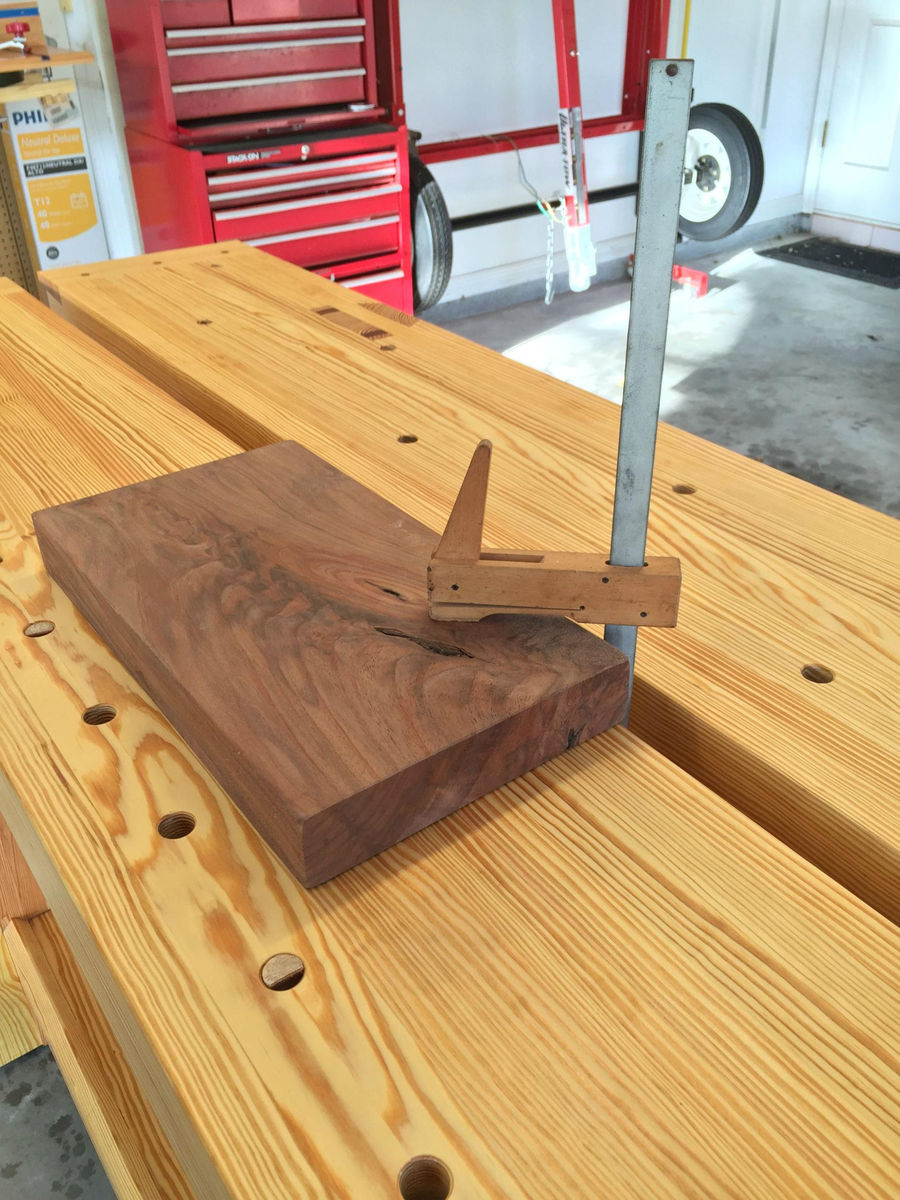
Now for some accessories for the new bench! First up: Doe's foot.
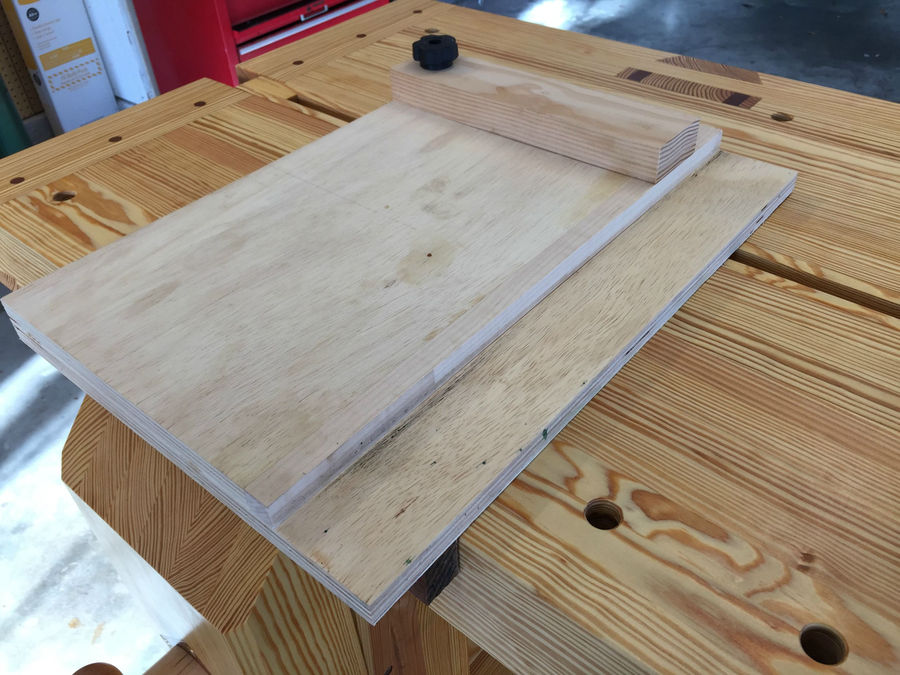
Shooting board
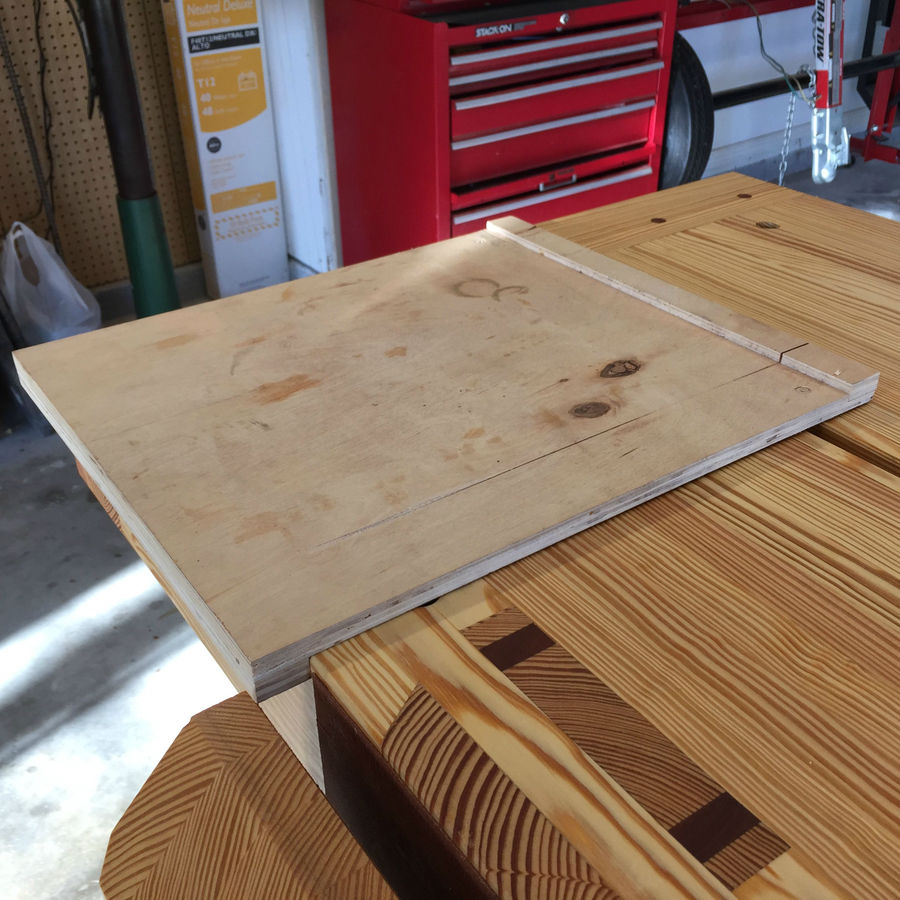
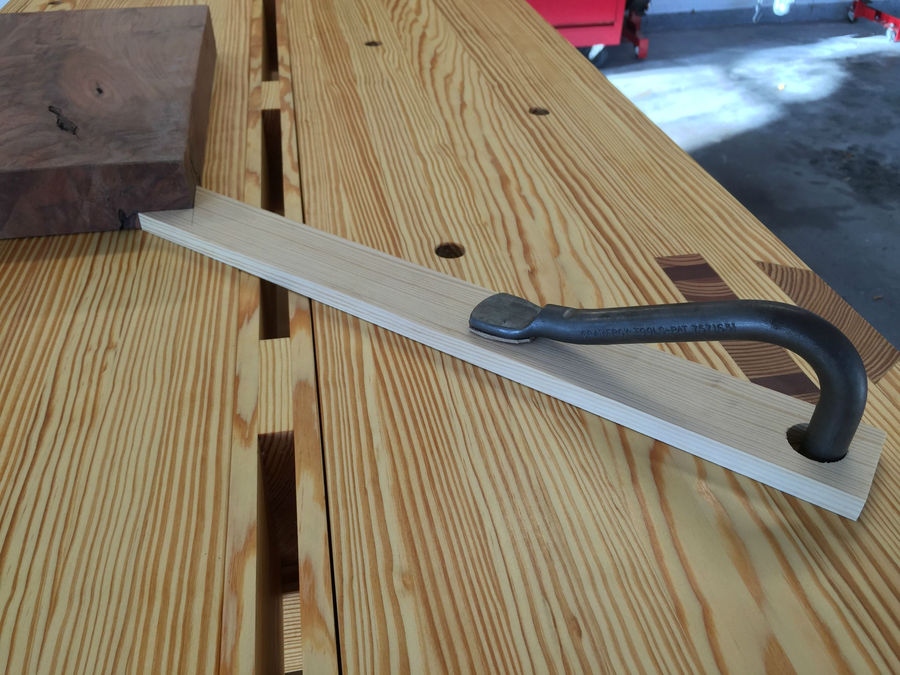
Bench hook
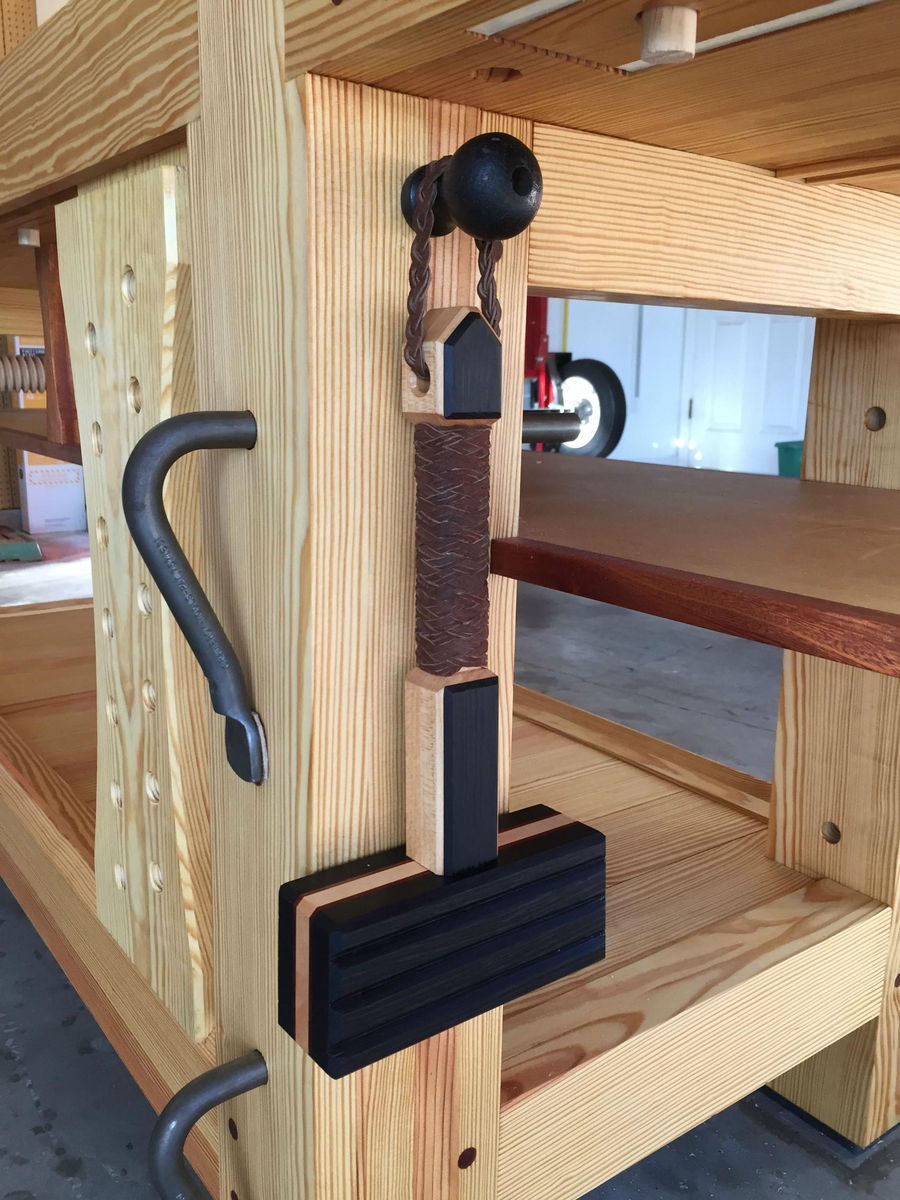
Doesn't everybody have Mjolnir in the shop?
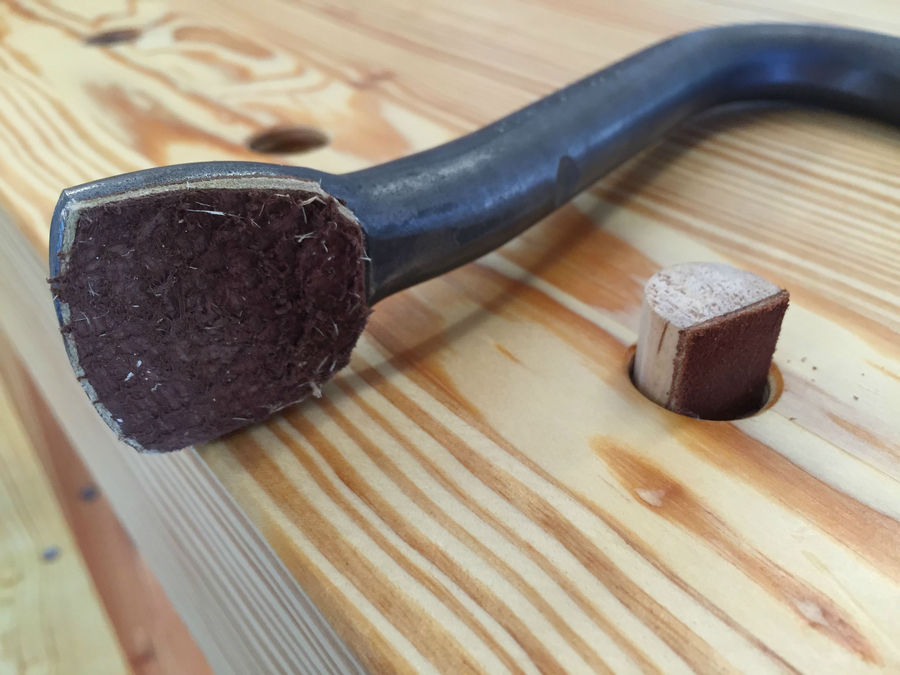
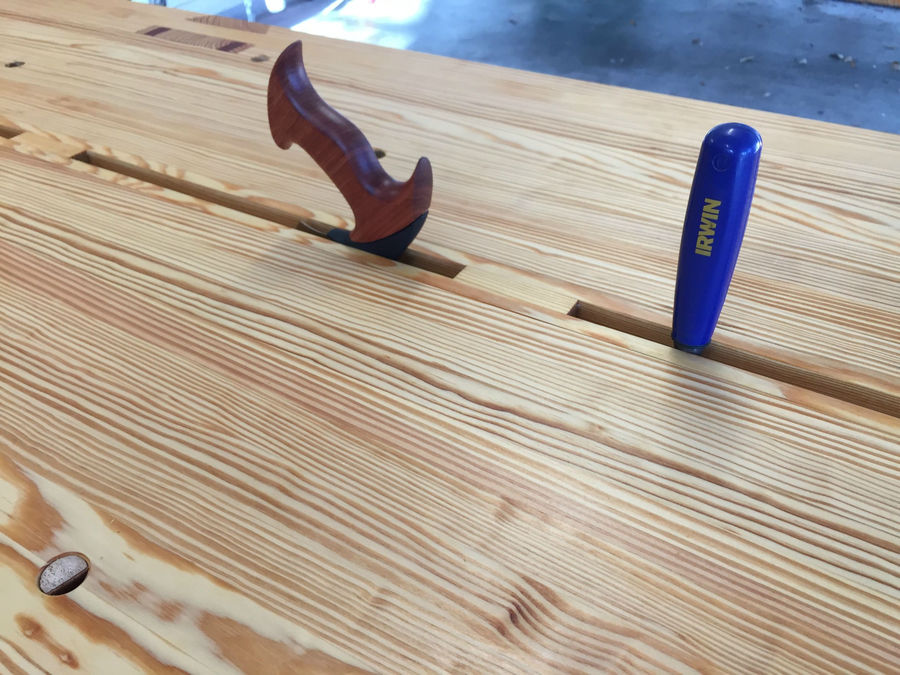
Leather padded holdfasts.
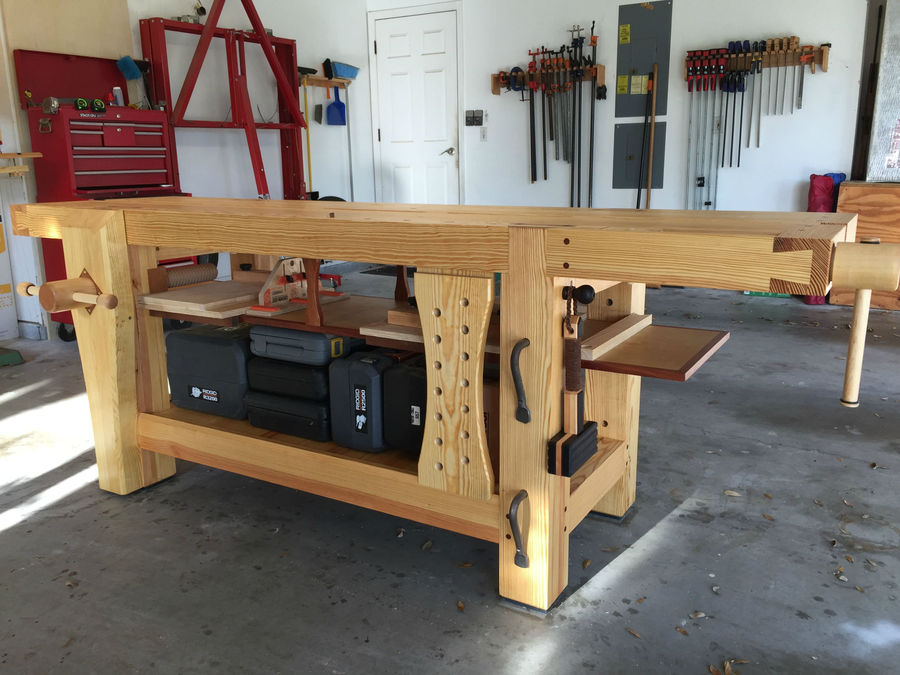
Shelves loaded up with gear. As a pretty fit guy, it takes no small amount of effort to lift one end off the ground. This thing's not going anywhere.
No comments:
Post a Comment